Hey Scrappers! Well I hope everybody is looking forward to this weekend. It is starting to cool down just a bit here in South Florida and we are enjoying it very much. Recently I joined a group called
C.S.I.: Color, Stories, Inspiration and every week they have a new case file, a challenge so to speak. They give you clues such as the colors you have to use, a list of evidence items that you have to choose from to use on your layouts and sometimes a sketch and lots and lots of sample layouts. So I did my first one and when I seen the colors and the sketch I knew I wanted to do a layout of my son when he was on the swim team. Now he went to one high school for the first couple of years and then to a different one for his last couple of years but the colors were perfect for the first high school. We had to use five different colors which were sky blue, scarlet red, gray, black, and teal blue. So I interpreted the clues as the sky blue and teal blue as water in the pool and the scarlet red and black were the school colors and they also show up in the swim suit and the the red in the floats for the lanes in the pool. I used the gray as an accent color. Out of the list of evidence items (you had to use at least 2) I used mixed media background, pen work, and circles. And for the journaling I did some handwritten journaling directly on the layout.
Here is the sketch that was posted that I used as inspiration for my layout.
So I did mine very similar to the sketch because it reminded me so much of what you would see at a high school swim meet. I used rosette flowers in the red and black for the school colors and strung the pictures on some red and white twine which were the color of the lane floats. I added banners in the sky blue and teal blue colors and some in the scarlet red and backed one with the gray. I matted the photos with the scarlet red and then gray. I used some older paper in my stash from Rusty Pickle called Swimming Words and the other half was plain black cardstock.
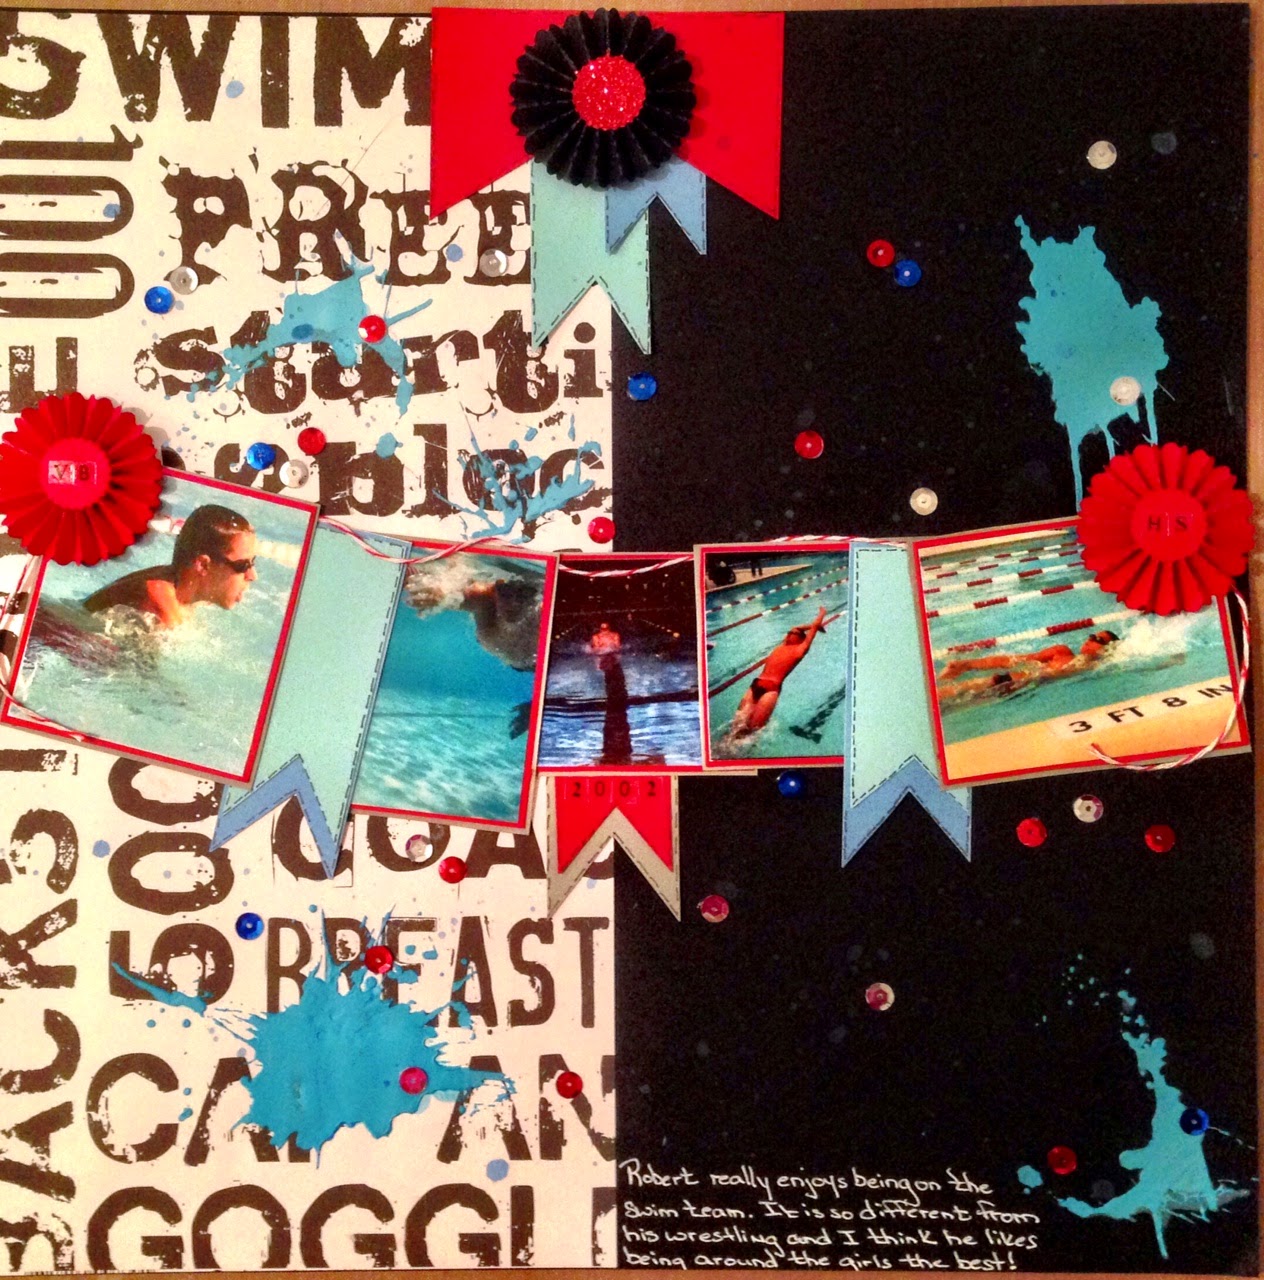
I did a mixed media background using some modeling paste with some pigment powder to add the blue color to it. I used a stencil from The Crafters Workshop called Mini Splats which I thought was perfect to represent the splashes of water from the pool. I did pen work on the banners to make the stand out more and red, silver, and blue sequins to represent the circles and it reminded me of patriotic colors that would be represented during sporting games. Also I splattered Tattered Angels Plain Jane Baseboard ink called Water (very fitting) around the layout. The only problem was it really did not show up on the black carstock very well at all. But if you look close it is there.
You should head over to CSI and check it out. It is really fun and a great way to get some inspiration and get out of your comfort zone especially with color combinations. Here are some close-ups of the layout and I hope you enjoyed it.


